Project Structure
 TL;DR - ApiLogicServer create
Whether created from a existing database or creating a new database, the creation process creates a customizable / executable API Logic Project, providing:
-
A JSON:API - Endpoint for each table, with filtering, sorting, pagination, optimistic locking, including related data access, based on relationships in the models file (typically derived from foreign keys)
-
An Admin App - multi-page, multi-table, with automatic joins
The presumption is iterative development: customize the project in your IDE to add custom endpoints, rules and Python for logic and security.
- Projects are fully configured for development (e.g. run configurations) and deployment (e.g., image creation, env variables).
- Projects are all source (no external databases etc), so can be managed using familiar source control such as GitHub.
What gets created
The key files that drive execution are described below. Note they are models - instead of lengthy generated code (what), they are Python declarations of how.
1. Data Model Classes
The Data Model Classes enable SQLAlchemy database operations for the system and your custom code. They are created automatically on project creation.
See rebuild for more information.
The system also creates a database diagram.
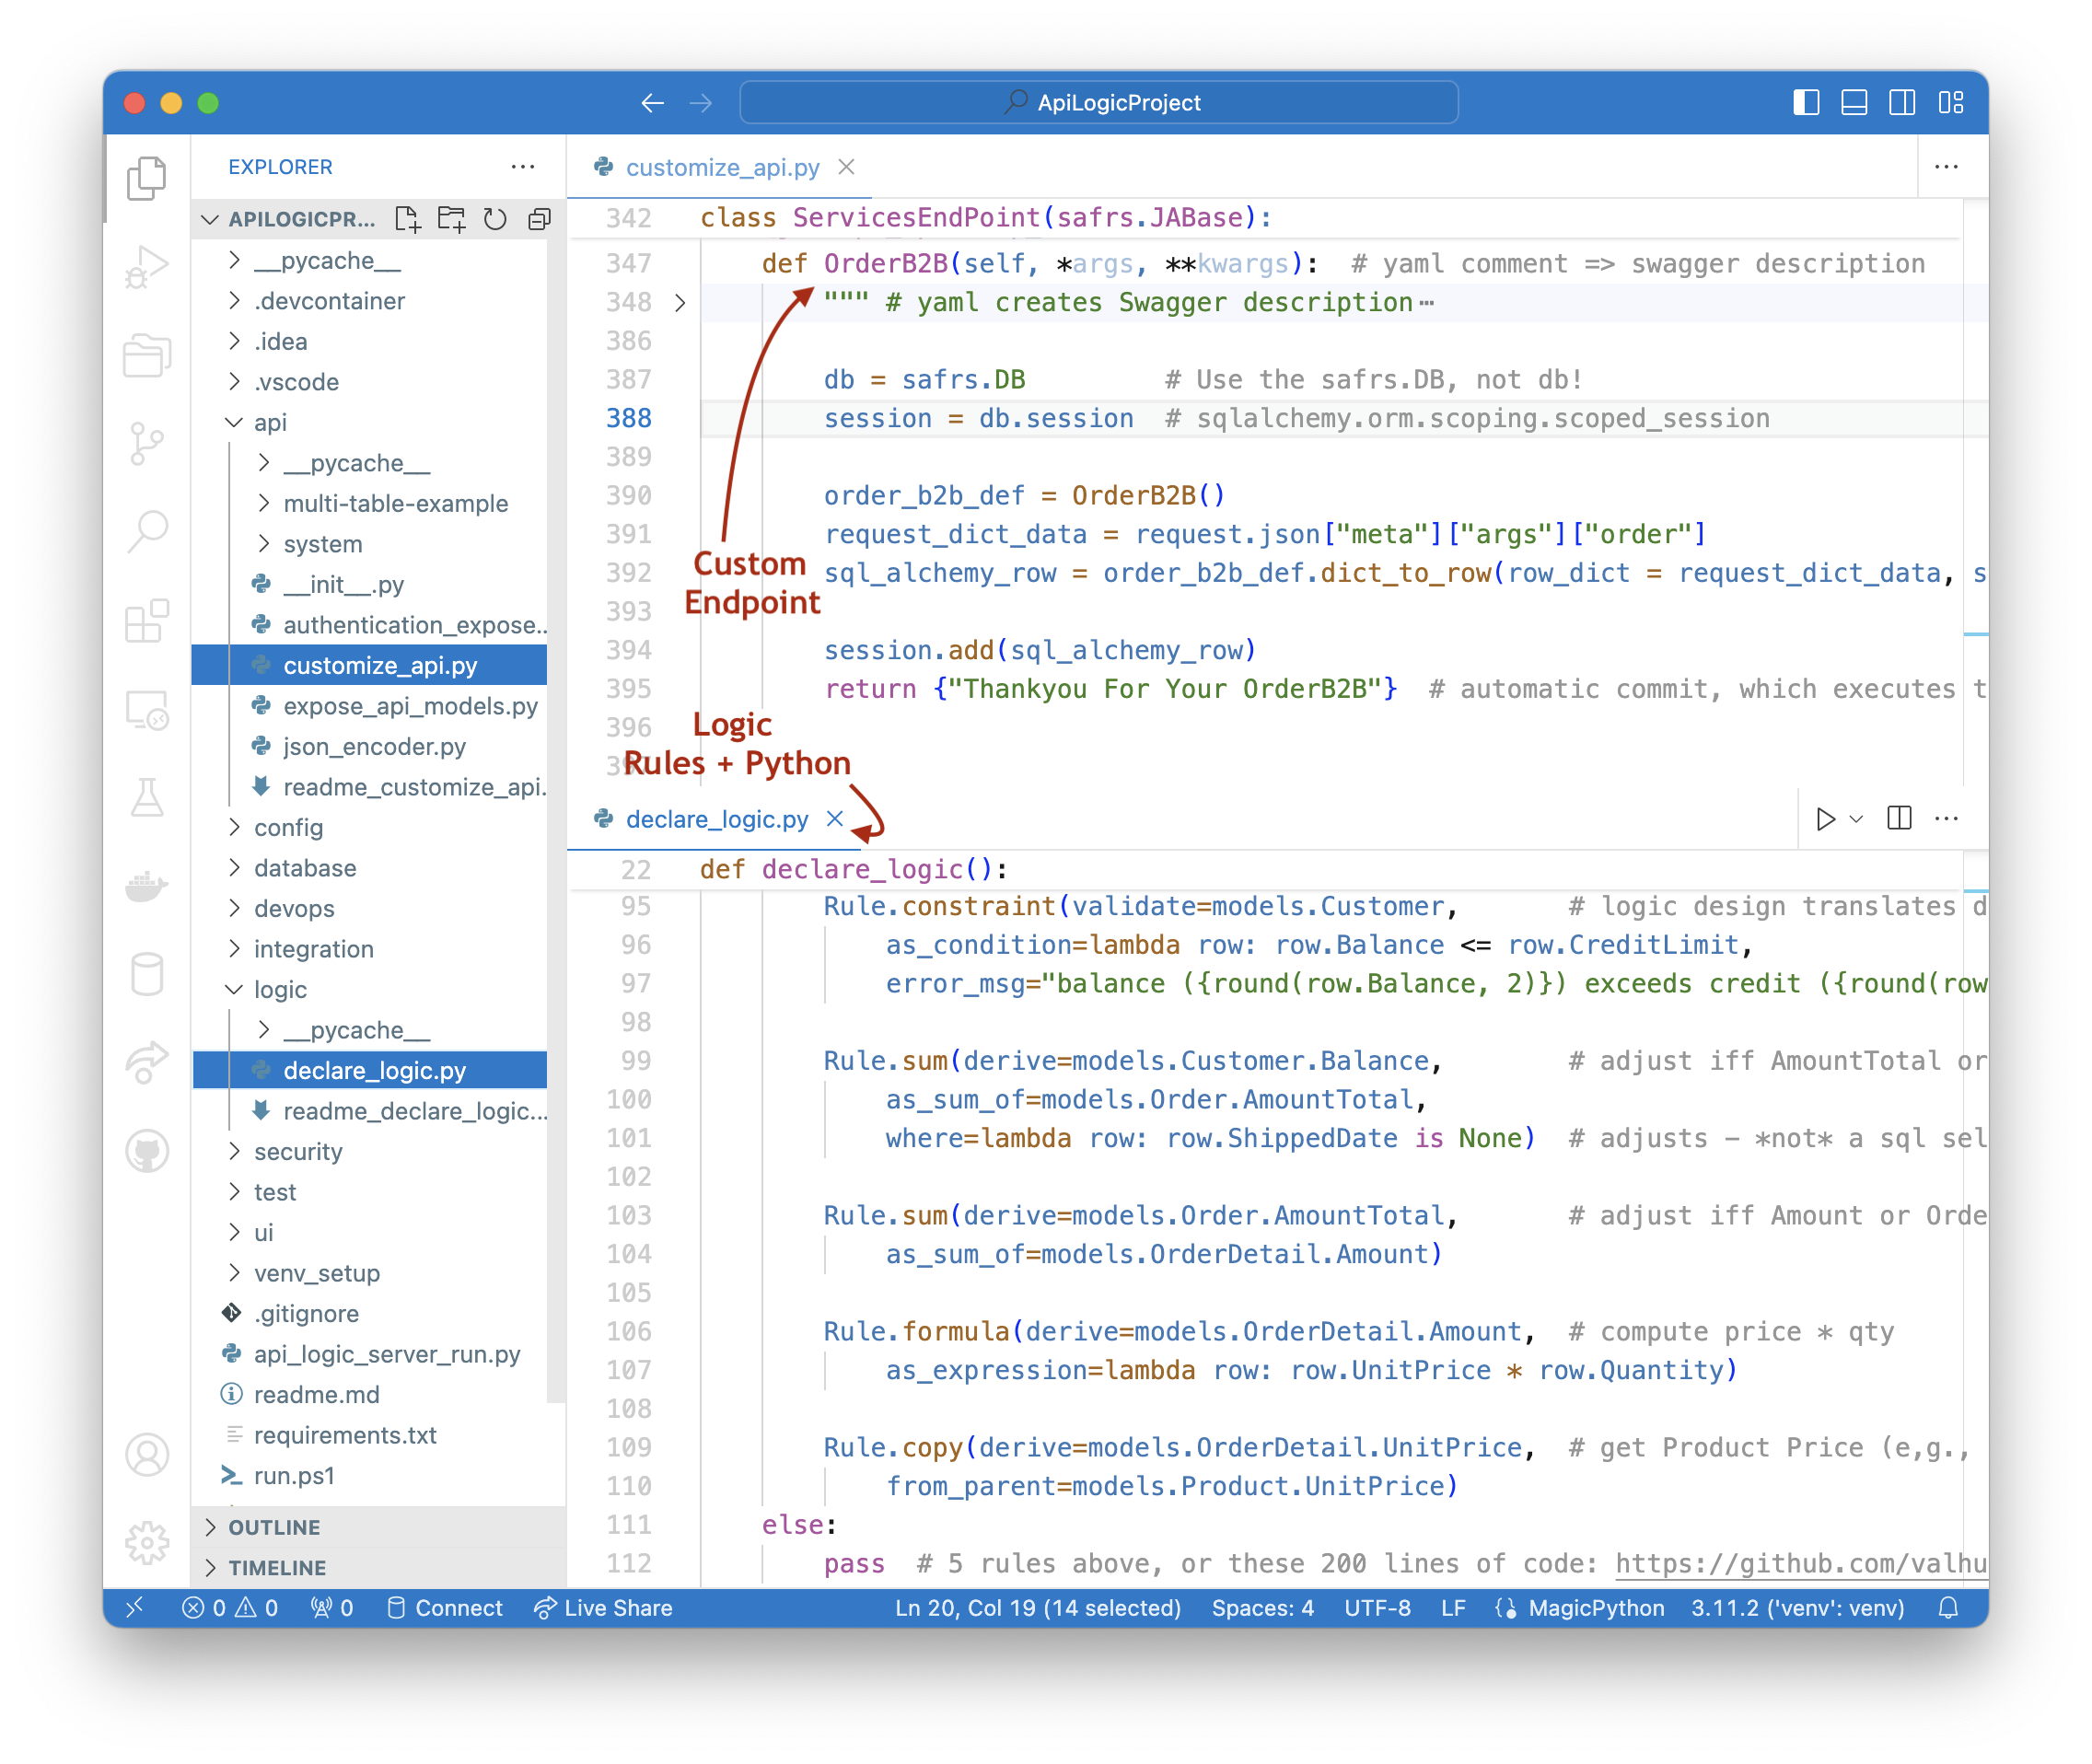
2. API
The JSON:API is driven by the model classes, so is very short.
3. Admin App
The Admin App is also a model (not extensive html and javascript), expressed in yaml.
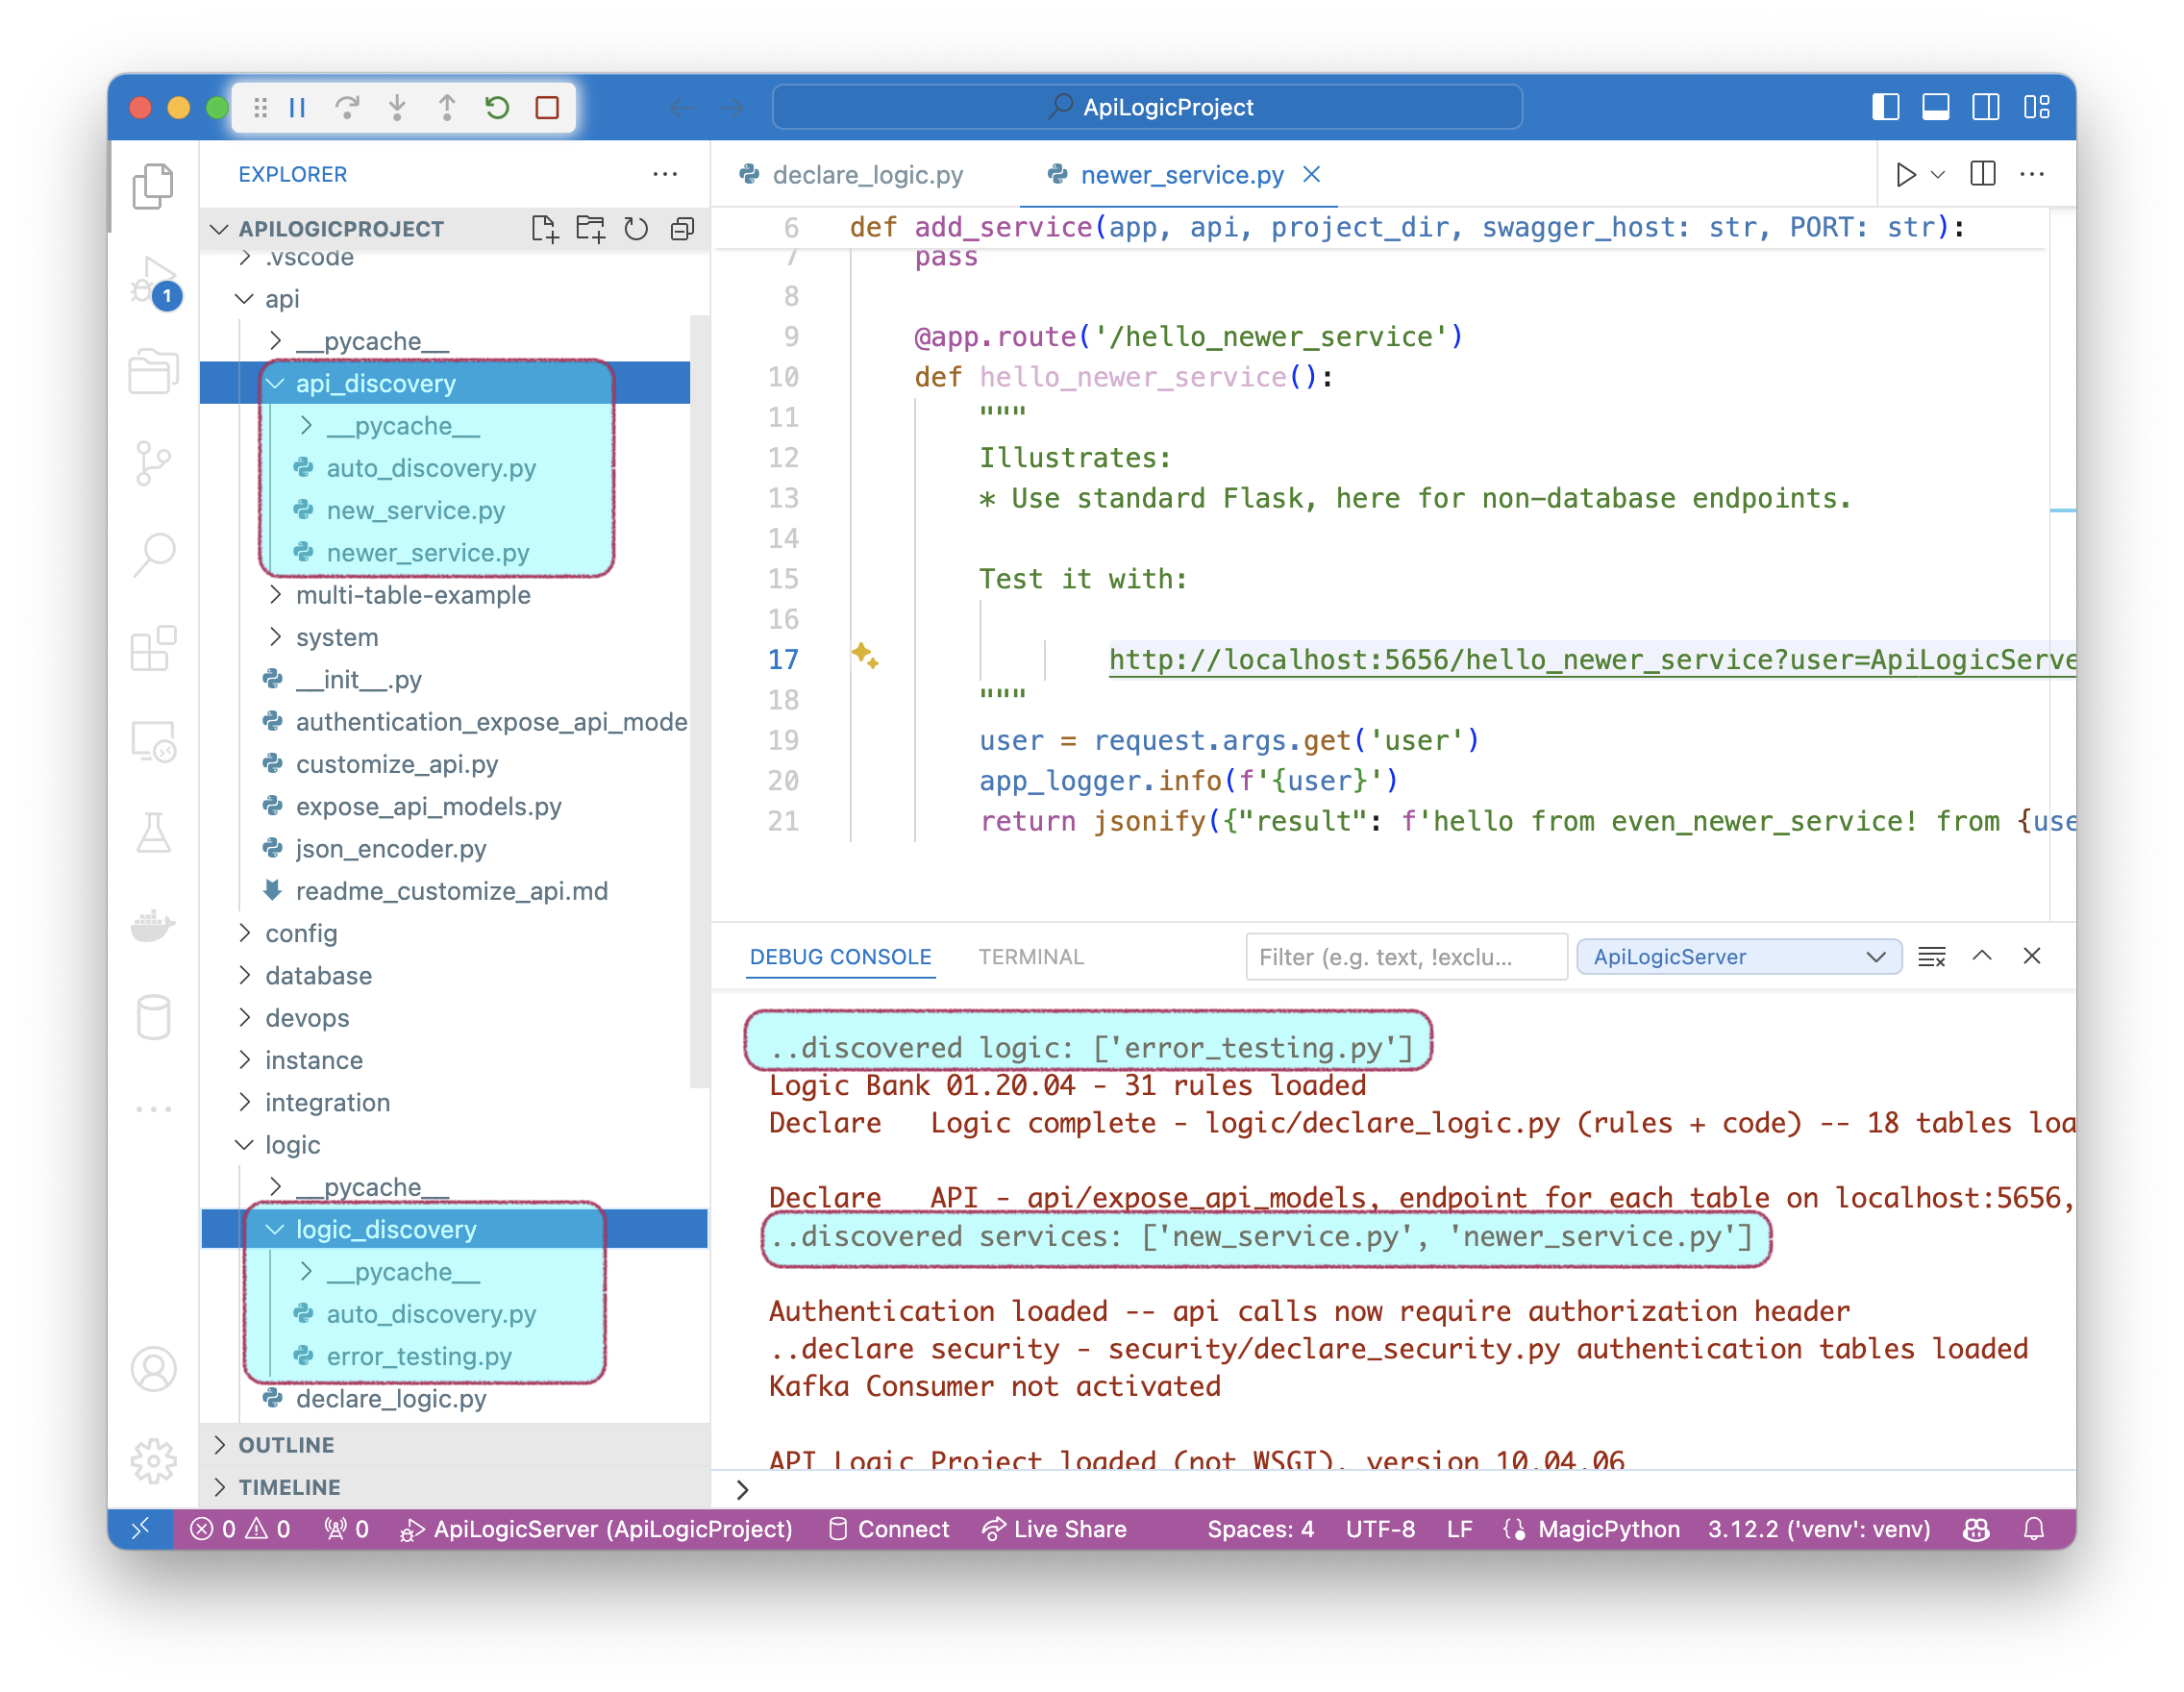
Discoverability - Logic, Services
In addition to altering the files noted above, you can use discovery. This enables logic and services to be broken up into multiple files, which are auto-discovered.
These can help teams integrate their work, with reduced conflict.
Project Structure
When you create an ApiLogicProject, the system creates a project like this that you customize in your IDE:
Explore the Tutorial Project, and observe that the projects are rather small. That is because the system creates models that define what, not now. Explore the project and you will find it easy to understand the API, data model, app and logic files.
Note the entire project is file-based, which makes it easy to perform typical project functions such as source control, diff, merge, code reviews etc.
When you create an ApiLogicProject, the system creates a project like this, pre-configured for Developer Oprations. See the notes below.
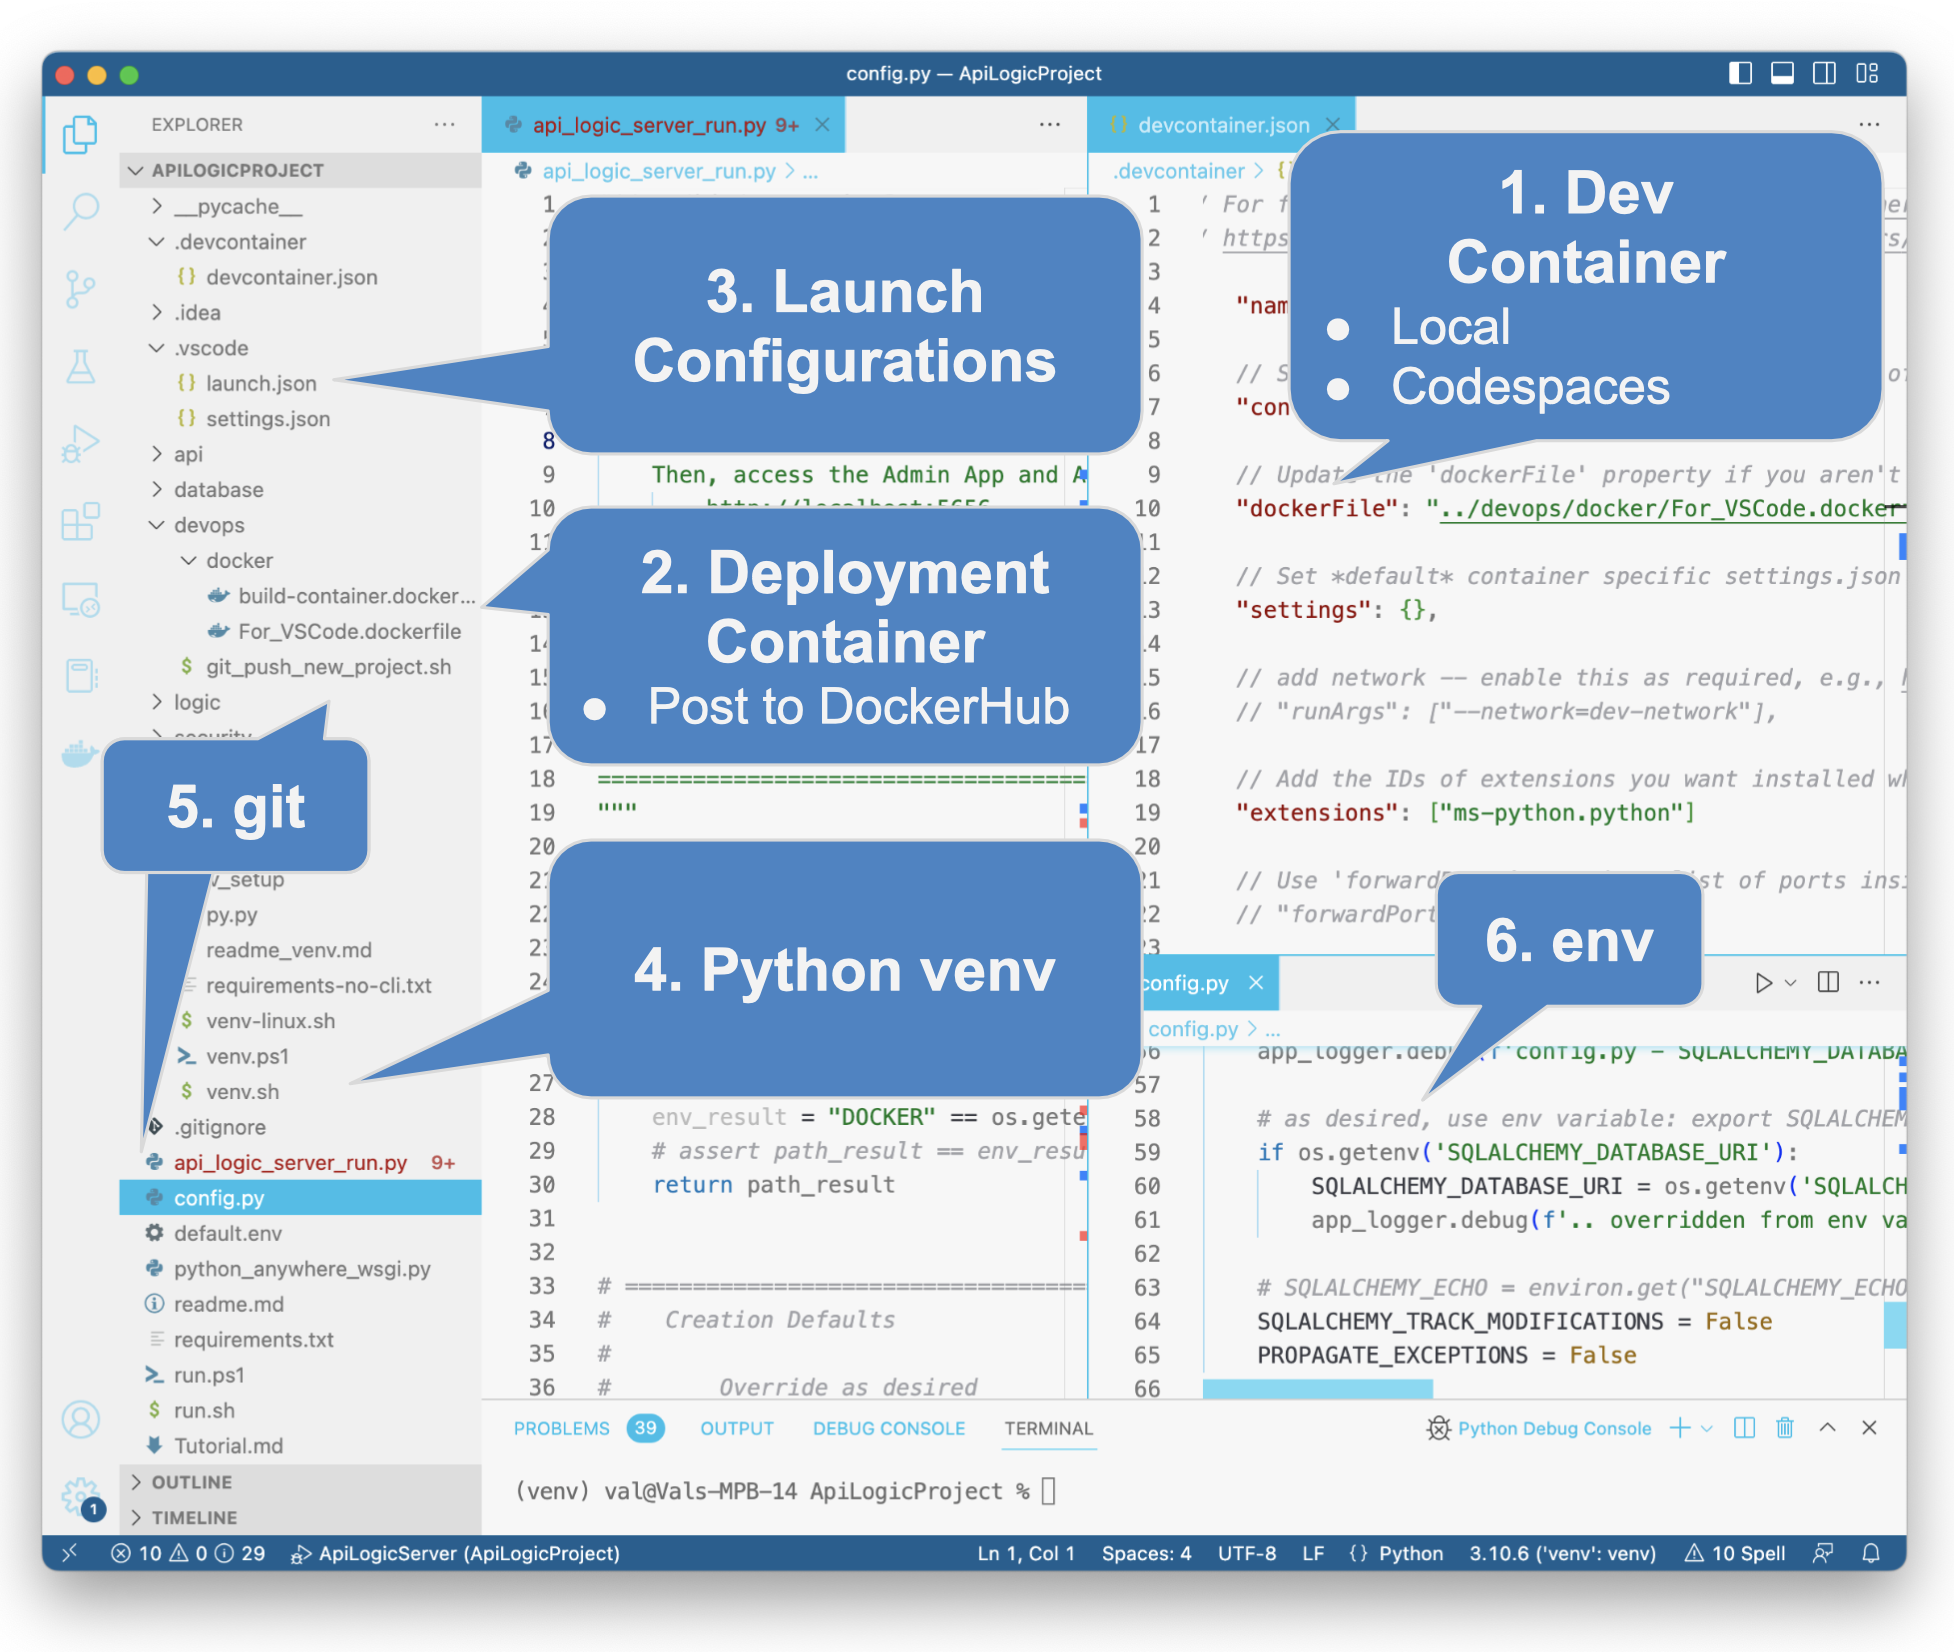
1. Dev Container
You can customize projects using a local install, or a container (see the Install Guide). Container support includes the .devcontainer folder, and the devops/docker/ForVSCode.dockerfile. You should not need to alter these.
In addition to desktop-based development, these enable Codespaces support (see the Express Eval).
2. Deployment Container
A common approach to deployment is to create a container for your project. The build-container.dockerfile is created for this purpose.
You will need to edit it to reflect your project and Docker account names.
3. Launch Configurations
These are created so you can run the API Logic Server, run tests, etc. You should not need to modify these, but you may wish to extend them.
Note the file that starts the project is api_logic_server_run.py, which obtains arguments from conf/config.py and environmental variables.
4. Python venv
The creation process builds a standard requirements.txt file. You can create your venv with this, and (if your IDE does not provide it) the venv.sh/ps1 files to initialize your venv.
For more on the virtual environment, click here.
5. GitHub
Your project includes a suggested .gitignore file (alter as desired). You can use git in standard ways to push and pull changes. Some IDEs support the initial GitHub creation (see VSCode publish, or you can use the git_push_new_project.sh file.
6. Configuration, env variables
Most deployment procedures discourage database names / passwords to be in project files and GitHub, instead preferring to specify these via env variables; click here for more information
IDE Friendly
The project structure above can be loaded into any IDE for code editing, debugging, etc. For more information on using IDEs, see here.
Tool-friendly - file-based
All project elements are files - no database or binary objects. So, you can store objects in source control systems like git, diff/merge them, etc.
Customizing ApiLogicProjects
You will typically want to customize and extend the created project. Edit the files noted ih the diagram at the top of this page.
Projects are created from a system-supplied prototype. You can use your own prototype from git (or a local directory) using the from_git parameter.
Architecture
The resultant projects operates as a (typically containerized) 3-tiered architecture, as described here.
ApiLogicServer CLI
API Logic Server consists of a CLI and various runtimes, as described here. The commands on this page (ApiLogicServer create etc) are part of the ApiLogicServer CLI.
The CLI operates in a standard way. Consider the following command:
createis a command; discover the commands withApiLogicServer--project-nameis an option; discover the options withApiLogicServer create --help
Note: as of release 10.3.45, you can use the abbreviation
alsinstead ofApiLogicServer