Create an API Logic Project
Create projects by establishing your Python environment, then issuing ApiLogicServer create .... The process differs slighly on whether you are using Docker, or a local install.
The procedures here will create the Tutorial, the recommended starting point. You will then want to create a project with your own database. For that, you will require a SQLAlchemy URI. You can see some examples with the command
ApiLogicServer examples.
If necessary, re-establish your Python environment:
Re-establish Python environment (already estaslished if you just installed)
cd ApiLogicServer          # your install folder
source venv/bin/activate   # windows venv\Scripts\activate
ApiLogicServer create      # accept default project name, db
Then, create your project:
If necessary, re-establish your Python environment:
Re-establish Python environment (already estaslished if you just installed)
cd ApiLogicServer  # directory of API Logic Server projects on local host

# Start (install if required) the API Logic Server docker container

docker run -it --name api_logic_server --rm -p 5656:5656 -p 5002:5002 -v ${PWD}:/localhost apilogicserver/api_logic_server
Then, create your project:
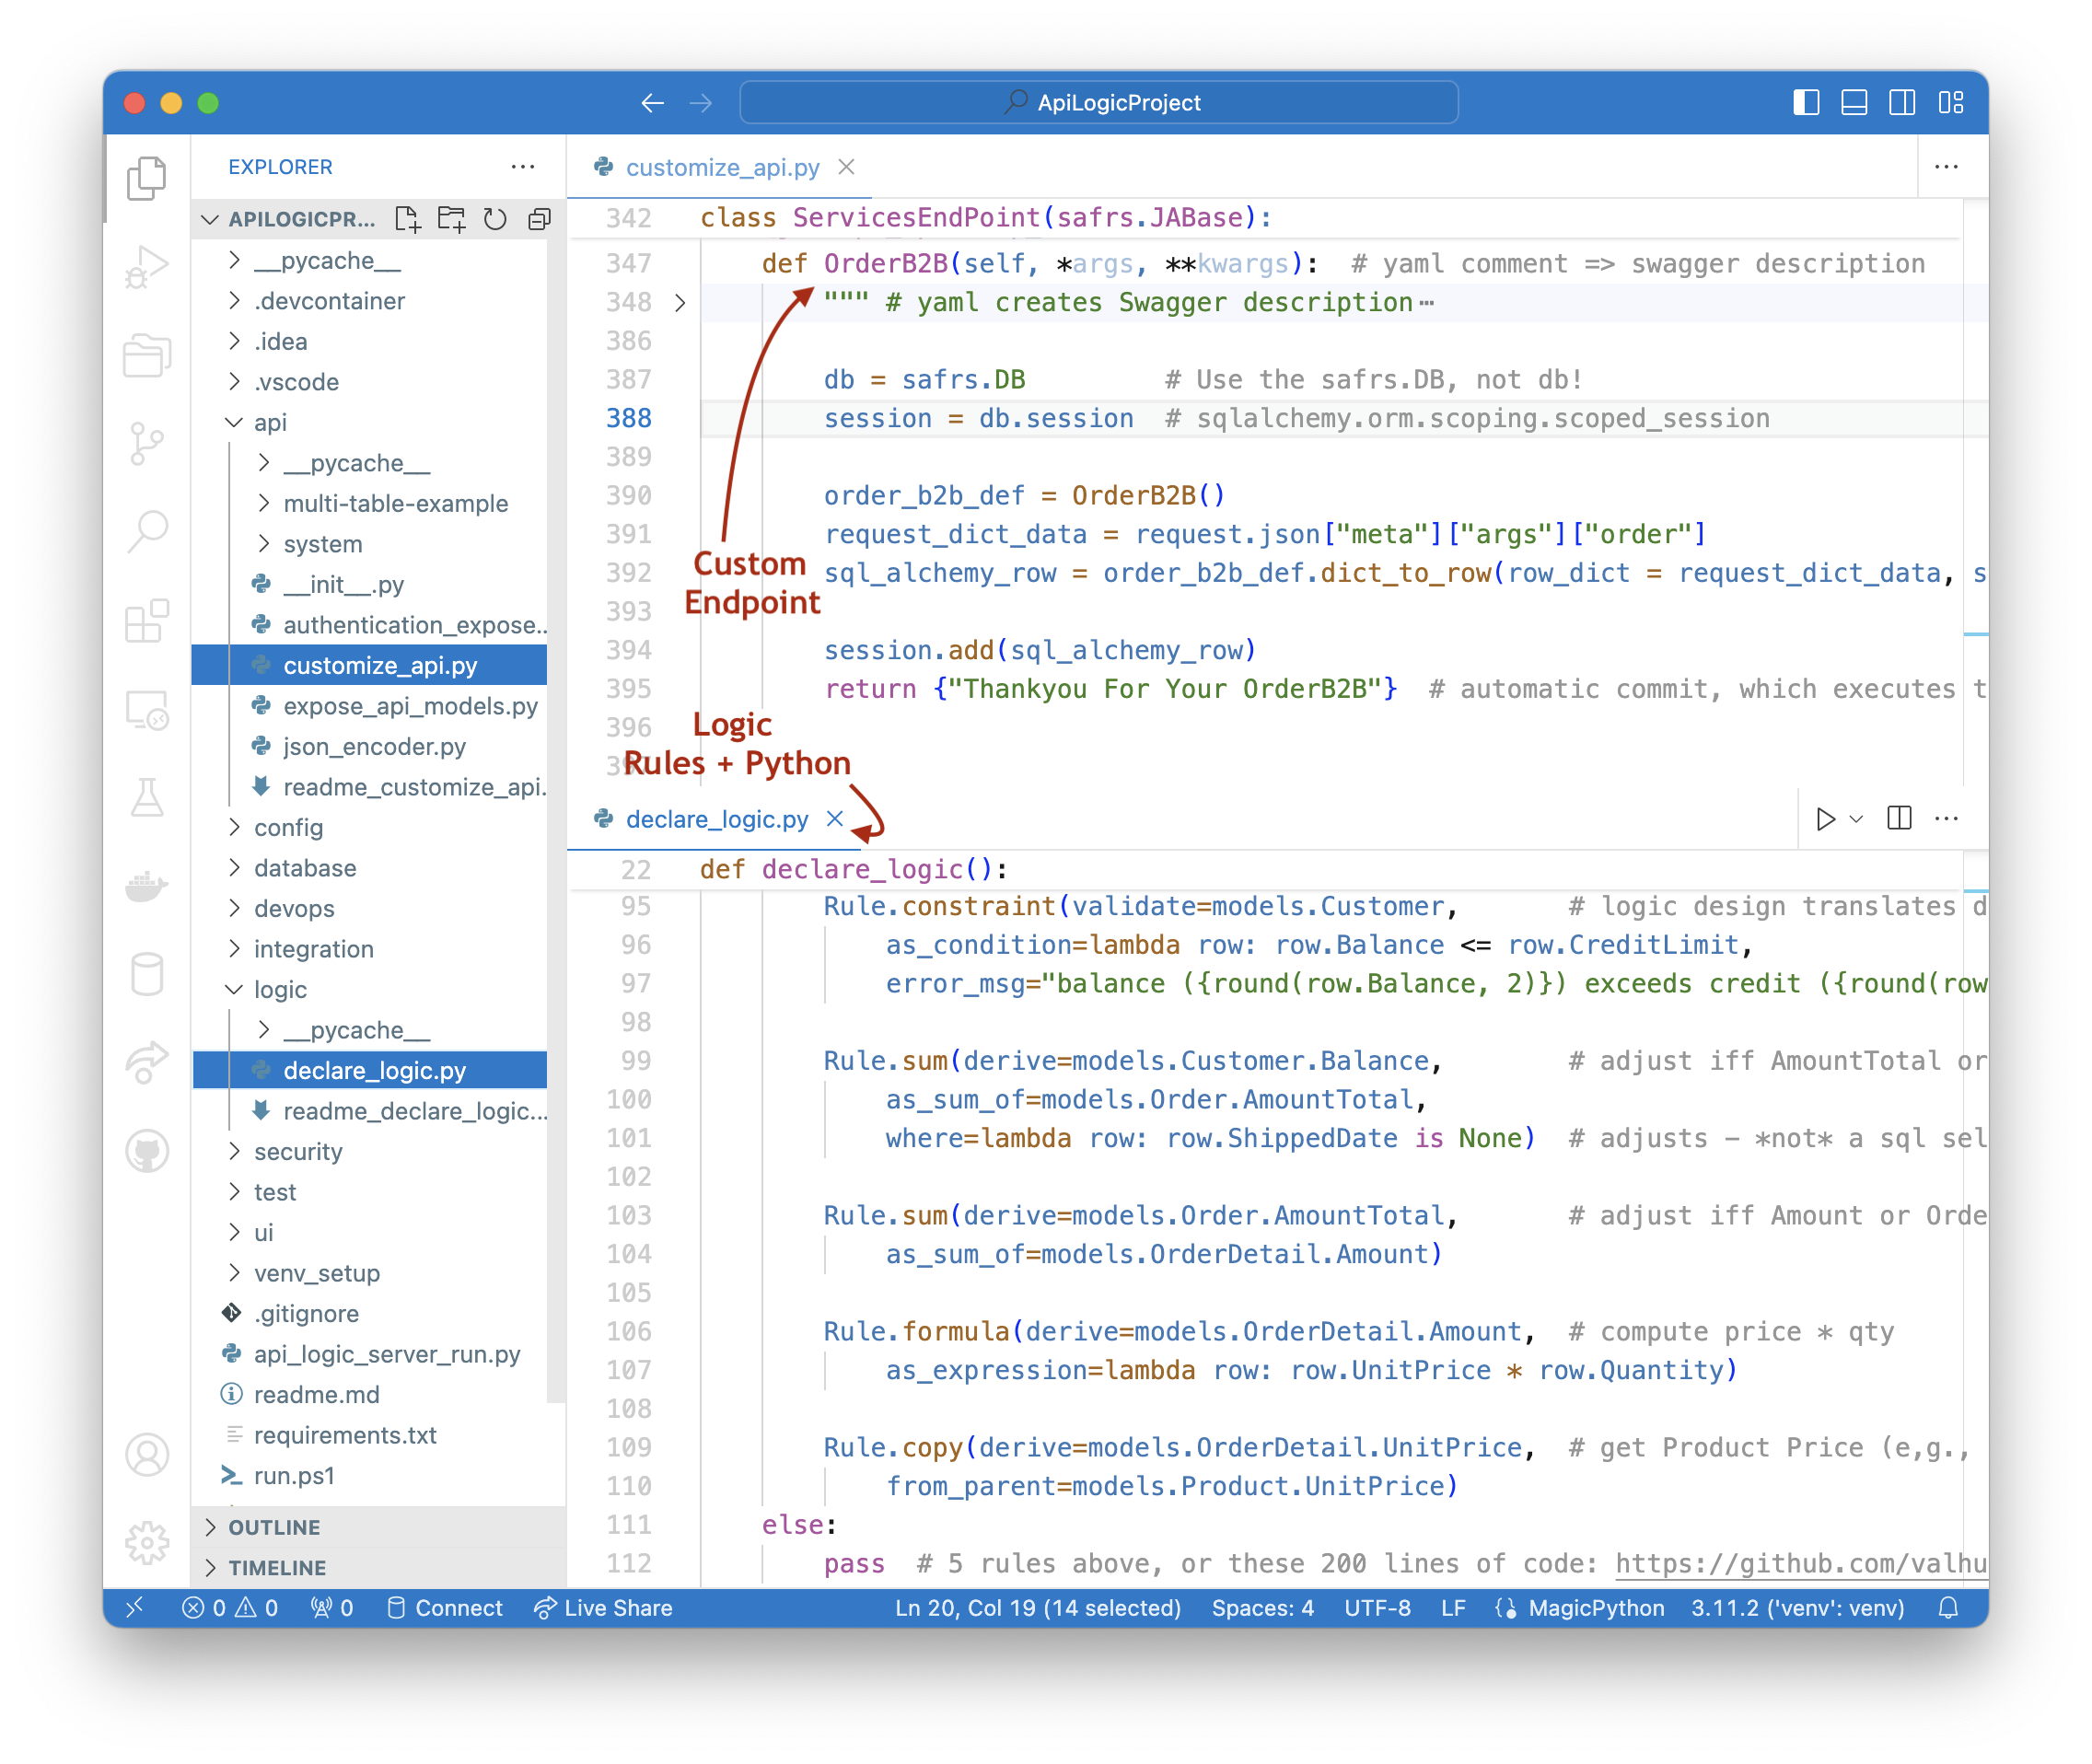
Project Directory Created
In either case, the create command builds an ApiLogicProject - a directory, shown here in VSCode: