Container Database
 TL;DR - Dev Deploy: Multi-Container Systems
This page shows the simplest way to deploy a dev system to the cloud, to enable collaboration with Business User and fellow developers:
-
Create a project from a sample dockerized database
-
Containerize your project
-
Deploy to Azure two containers using docker compose:
- Your project
- A database container, with both the DBMS and data
Containers are a best practice for deployment, and offer several advantages for development. This outlines a typical scenario for deploying API Logic Server projects to Azure.
Rapid Cloud Preview
This project illustrates using API Logic Server with Docker and docker-compose. The objective is to provide a simple way to explore using docker with API Logic Server on your local machine. These are not production procedures - they are designed for simple local machine operation.
This doc explains:
-
I. Create the Project, and Verify Local Operation - run the project
-
II. Add Security
-
III. Run as image - create and run an image
-
IV. Run as docker-compose - multi-container -- build, deploy and run
-
V. Deploy to Cloud
This presumes you have installed API Logic Server, and docker. You will need an Azure account.
Confirm the Happy Path
You will will certainly use different procedures for dev and production deployment. These introduce variables into a complicated procedure.
So, we encourage you to follow this "Happy Path" guide closely, to
- Confirm you can deploy using a known database / procedure, and
- Establish a reference example for your procedures
I. Create the Project
Follow the steps below:
1. Start the database container
docker run --name mysql-container --net dev-network -p 3306:3306 -d -e MYSQL_ROOT_PASSWORD=p apilogicserver/mysql8.0:latest
Verify it looks like this:
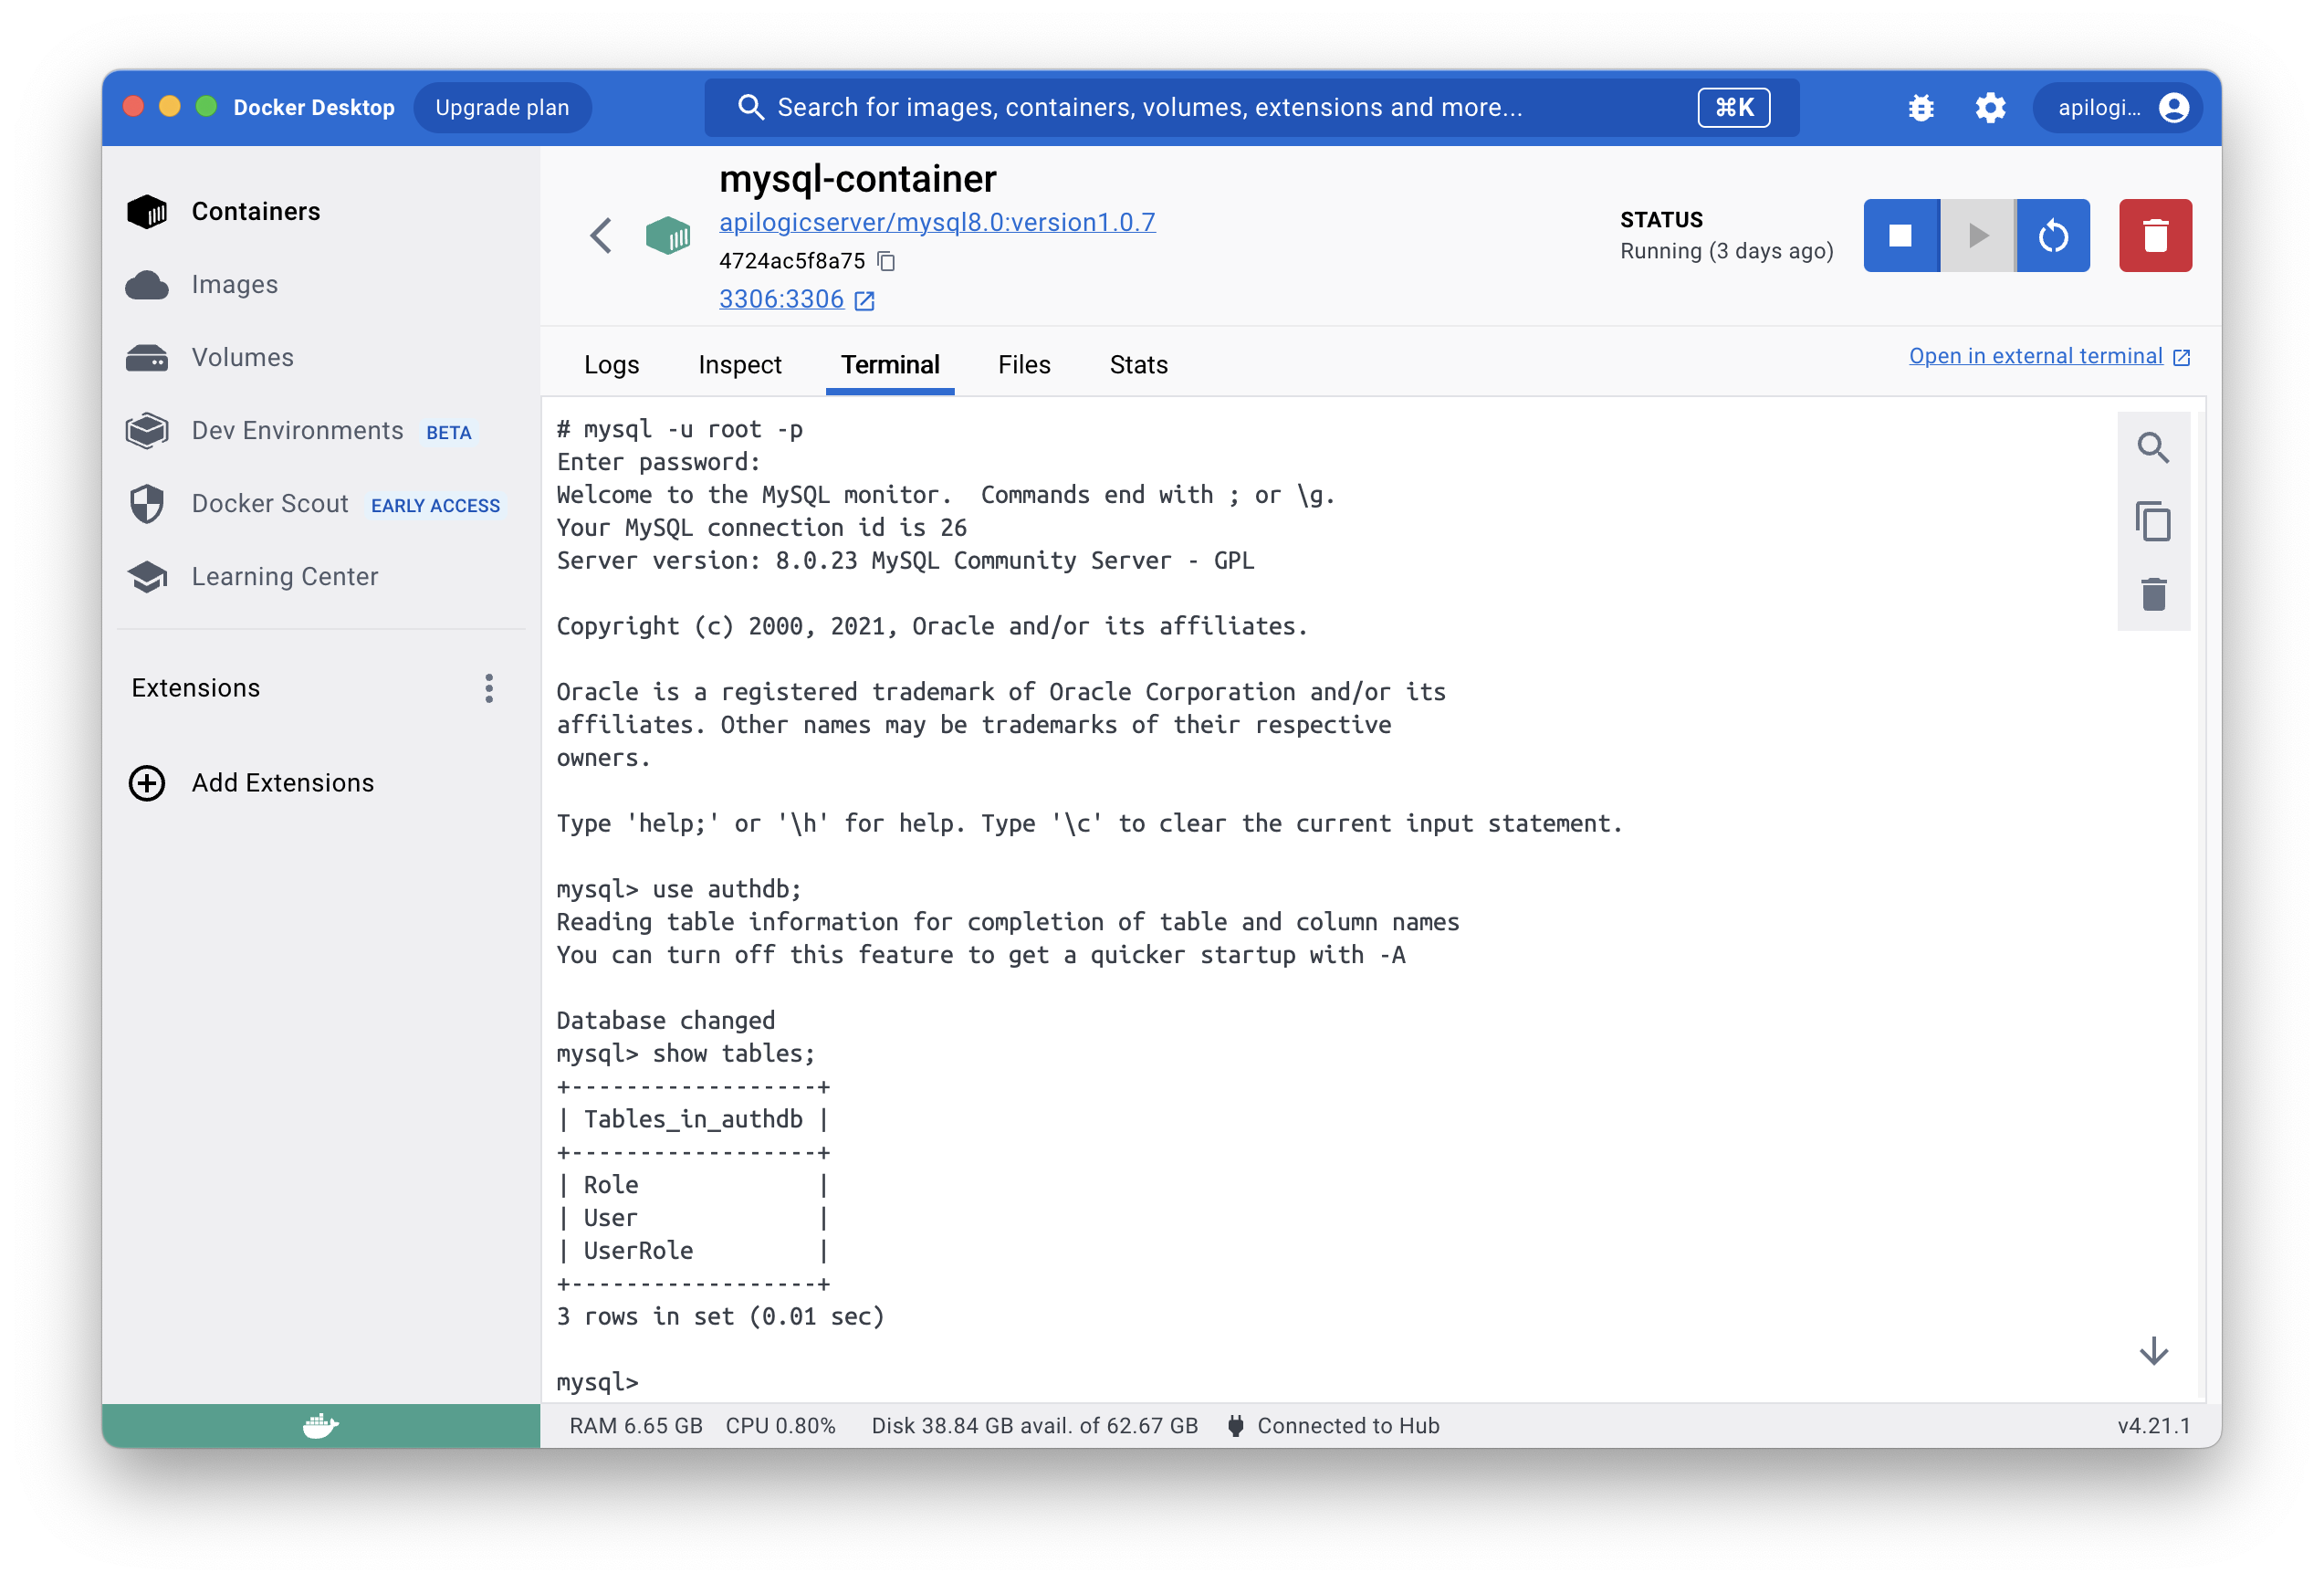
Note: The docker image contains the DBMS and data to simplify this tutorial. You would almost certainly use volumes in normal practice, but this simplifies the tutorial.
2. Create the Project
Create the project with API Logic Server:
ApiLogicServer create --project_name=classicmodels --db_url=mysql+pymysql://root:p@localhost:3306/classicmodels
The command above uses the pre-supplied docker database, here MySQL.
Or, use postgres: ApiLogicServer create --project_name=postgres-nw --db_url=postgresql://postgres:p@localhost/postgres.
3. Start the Server, Test
The project should be ready to run without customization:
- Open the project in VSCode
-
Establish your (possibly preview) virtual environment
-
Press F5 to run the server
-
Run the Admin App, and Swagger. Verify that
customersreturns data.
II. Add Security
Using the terminal window inside VSCode:
Stop the server.
Open a new terminal window in VSCode:
The current terminal window has an old copy of the project root. If you try to run, you will see *No such file or directory". Just open another terminal window and repeat the command.
The system introspects your --db_url database, creates models for it, and configures your project to enable security.
Security databases must include certain tables and columns. Your authdb can optionally provide a superset of these. Such extensions are useful in declaring role-based authorization.
To help you get started, the devops/auth-db directory provides starter kits for creating these databases. Alter these files for your project, prepare database containers for your team, and use them in the add-auth command above.
Re-run the project (F5), observe you need to login (admin, p).
Or, use postgres: ApiLogicServer add-auth --project_name=. --db_url=postgresql://postgres:p@localhost/authdb
III. Run as image
These scripts simplify creating and running docker containers for your project. See details in the sub-sections below.
Important Notes:
-
The docker compose steps (below) use the created image, so you must perform this step first
-
The image must contain the security models created in the step above
1. Stop the Server
Stop the API Logic Project, using your IDE.
2. Build the Image
For preview versions, verify
devops/docker-image/build_image.dockerfileis usingapilogicserver/api_logic_server_x(note the _x).
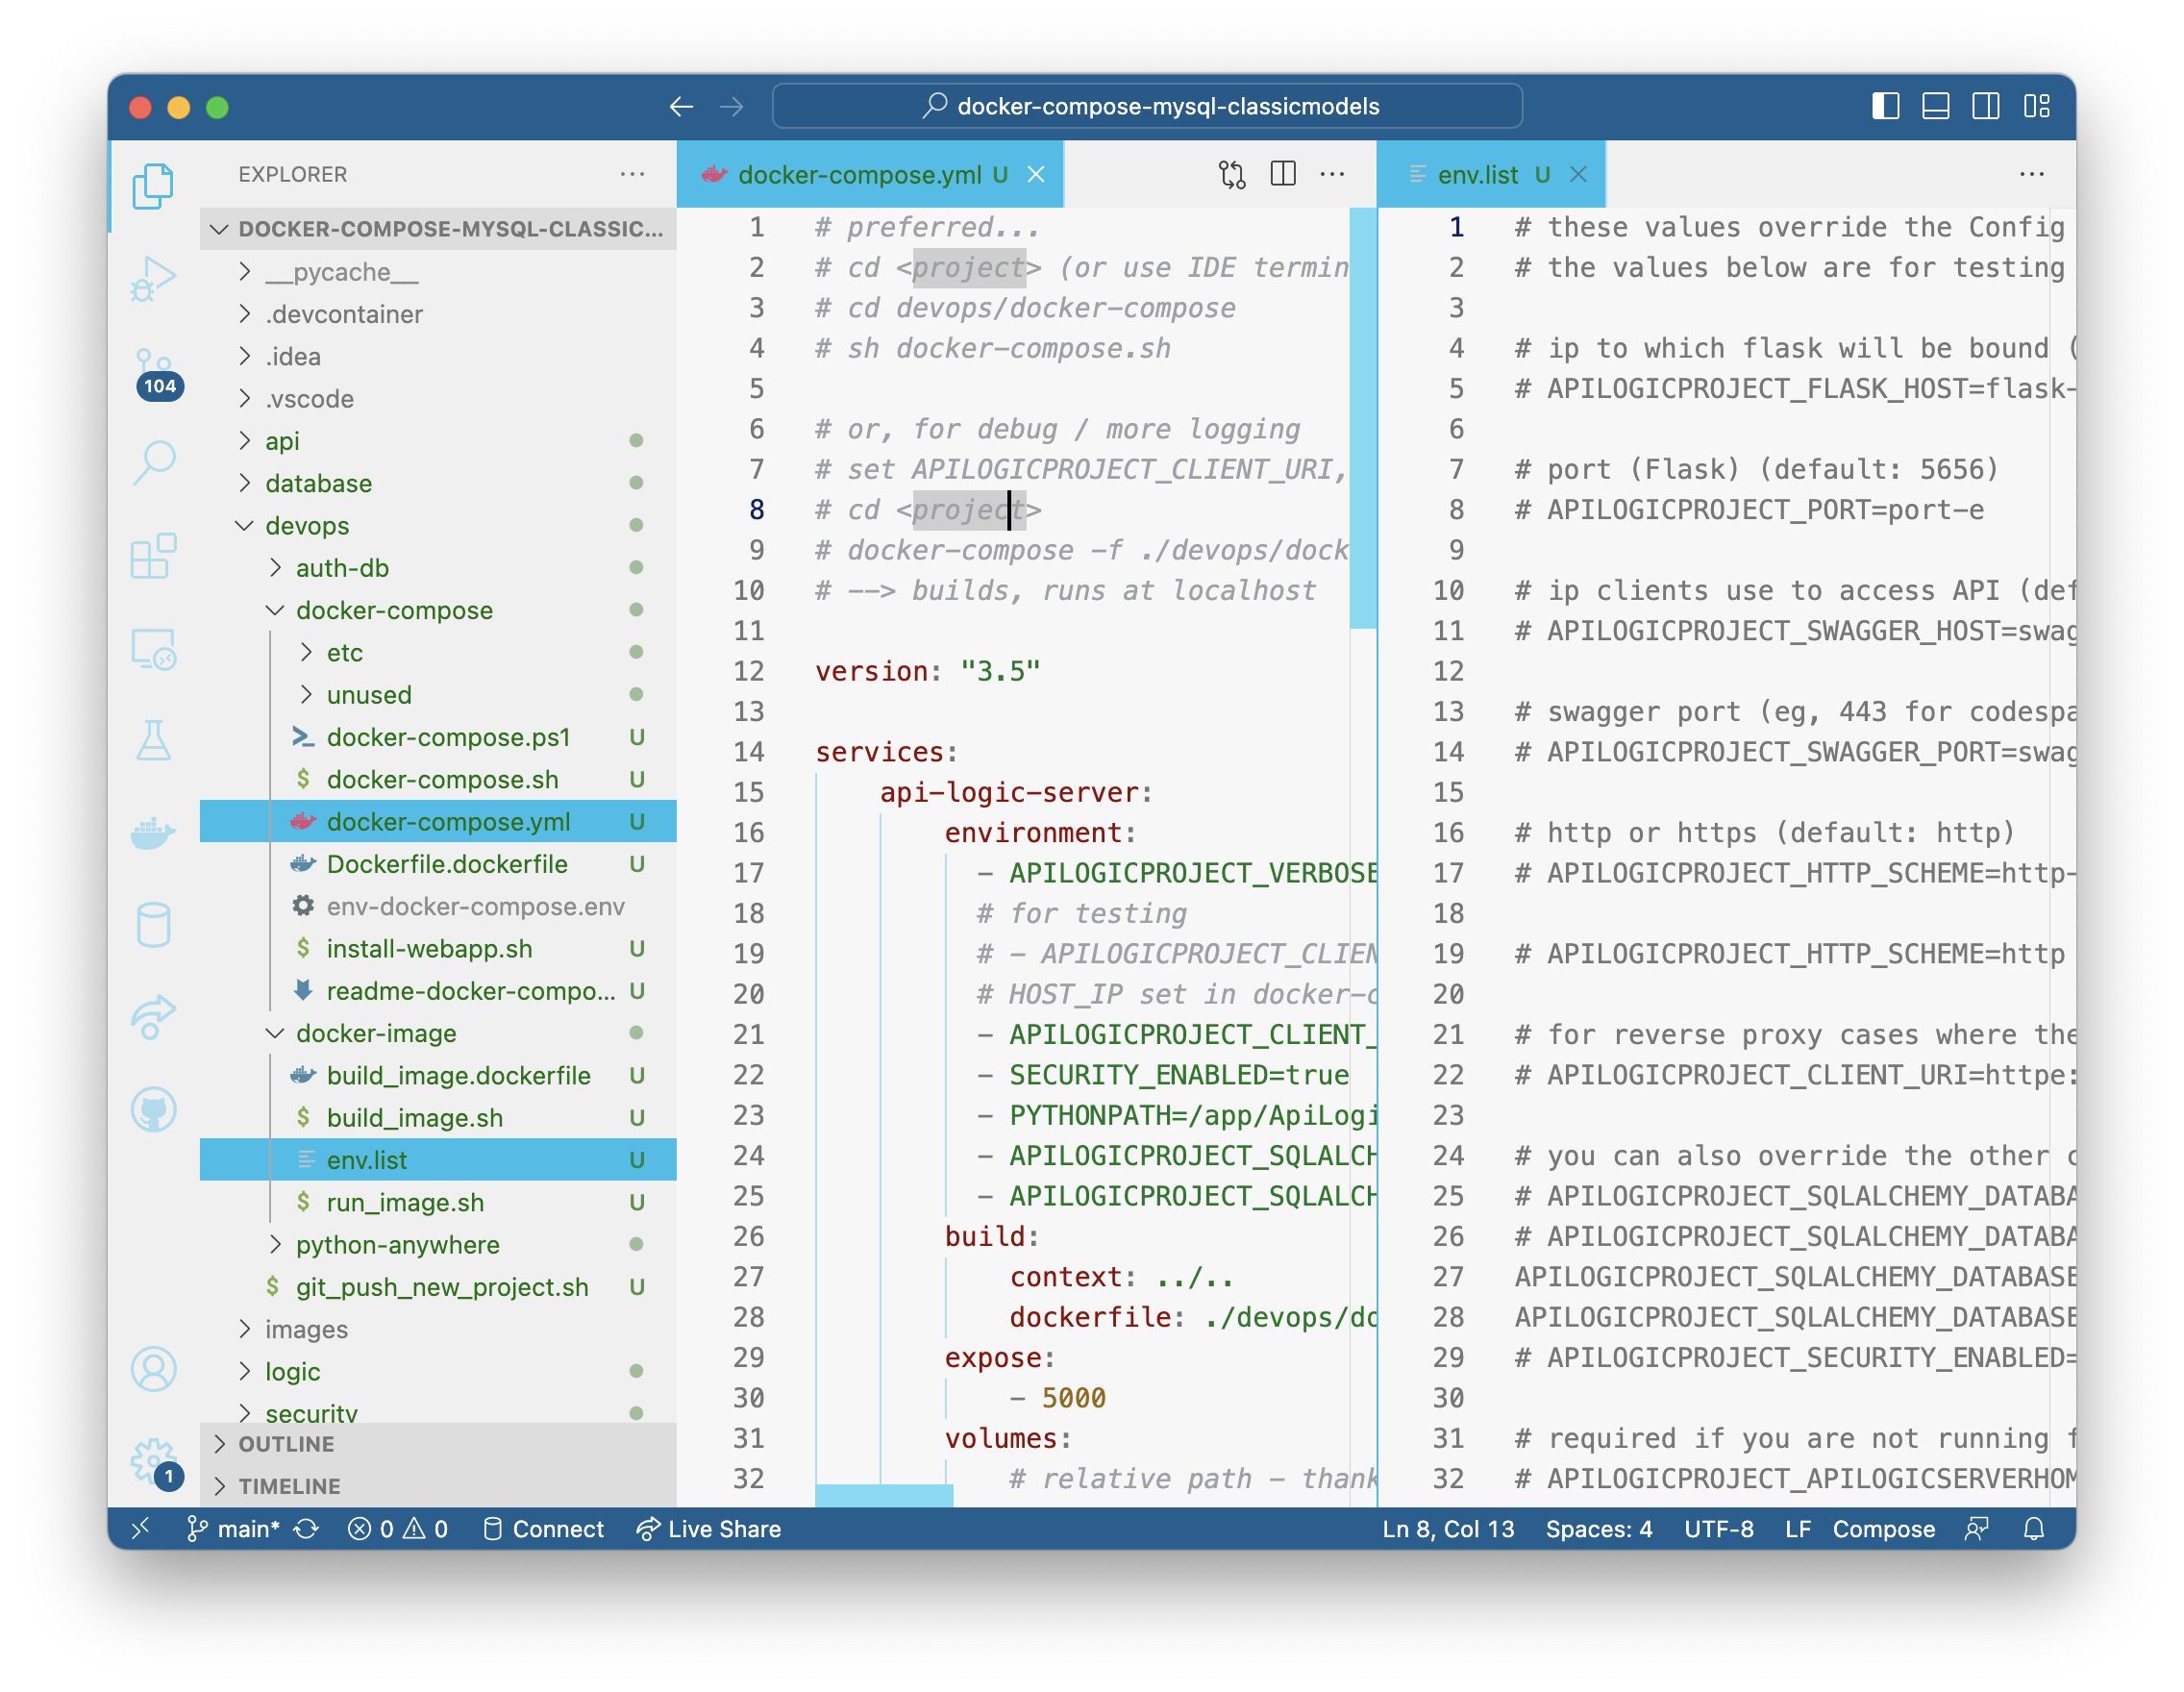
3. Observe database config
When run from a container, the database uri using localhost (from above) does not work. Confirm the following in devops/docker-image/env.list:
APILOGICPROJECT_SQLALCHEMY_DATABASE_URI=mysql+pymysql://root:p@mysql-container:3306/classicmodels
APILOGICPROJECT_SQLALCHEMY_DATABASE_URI_AUTHENTICATION=mysql+pymysql://root:p@mysql-container:3306/authdb
4. Start the Server, Test
1. Start the Server: use the pre-created command line script to run the container from the image:
2. Test the App: browse the Admin App, and Swagger
You can also run the Authentication Administration App to define users and roles (though not required).
IV. Run as docker-compose
Use docker compose to choreograph multiple services (e.g, your application and database) for a multi-container system.
1. Stop the system
You must now:
-
Stop the API Logic Project container - press ctl-C
-
Stop the database container (e.g., using Docker Desktop).
- The procedure below will spin up another database container. If the current database container is running, you will see port conflicts.
2. Observe database service
Open devops/docker-compose-dev-local/docker-compose-dev-local.yml, and observe the database service:
    mysql-service:
        image: apilogicserver/mysql8.0:latest
        restart: always
        environment:
            # MYSQL_DATABASE: 'db'
            # So you don't have to use root, but you can if you like
            - MYSQL_USER=root
            # You can use whatever password you like
            - MYSQL_PASSWORD=p
            # Password for root access
            - MYSQL_ROOT_PASSWORD=p
        ports:
            # <Port exposed> : <MySQL Port running inside container>
            - '3306:3306'
        expose:
            # Opens port 3306 on the container
            - '3306'
3. Observe the app service
In devops/docker-compose-dev-local/ddocker-compose-dev-local.yml, observe the database service uses the your application image, and has configured the database URIs to your database service, above:
    api-logic-server:
        image: apilogicserver/classicmodels
        environment:
          - APILOGICPROJECT_VERBOSE=true
          # for testing
          # - APILOGICPROJECT_CLIENT_URI=//10.0.0.77
          # HOST_IP set in docker-compose.sh/ps1
          # - APILOGICPROJECT_CLIENT_URI=//${HOST_IP}
          - SECURITY_ENABLED=true
          ## - APILOGICPROJECT_HTTP_SCHEME=https
          ## - PYTHONPATH=/app/ApiLogicProject
          ## database uri's:
          - APILOGICPROJECT_SQLALCHEMY_DATABASE_URI=mysql+pymysql://root:p@mysql-service:3306/classicmodels
          - APILOGICPROJECT_SQLALCHEMY_DATABASE_URI_AUTHENTICATION=mysql+pymysql://root:p@mysql-service:3306/authdb
        expose:
          - 5656
        ports:
          - 5656:5656
4. Observe Security
The database contains authdb. To see how it was configures, observe devops/docker-compose/docker-compose.yml:
-
Observe
- SECURITY_ENABLED=true -
Under api-logic-server-environment, observe:
- APILOGICPROJECT_SQLALCHEMY_DATABASE_URI_AUTHENTICATION=mysql+pymysql://root:p@mysql-service:3306/authdb
5. Build, Deploy and Run
The following will build, deploy and start the container stack locally:
Then, in your browser, open localhost:5656.
V. Deploy to cloud
This procedure is modeled after this article; it uses this project. We'll be performing the basic steps:
-
Create a resource group and service plan
-
Deploy an multi-container application:
-
API Logic Project image from DockerHub
-
A Database Container
1. Acquire Project Files
The following setup steps are required. You will modify these for your own project. You can use the apilogicserver project/image for this exercise.
a) Push Project to github
We've already pushed the classicmodels project, so this step is not required in the tutorial.
b) Push DB Image to DockerHub
We've already pushed the classicmodels image, like this:
docker tag apilogicserver/classicmodels apilogicserver/classicmodels:latest"
docker push apilogicserver/classicmodels:latest"
As noted above, this database image includes you data, so there is no need to worry about volumes. If you wish, you can create "DBMS + Data" images for your own projects, like this.
c) Acquire file in Azure
To obtain the project files (docker compose, etc), use the portal:
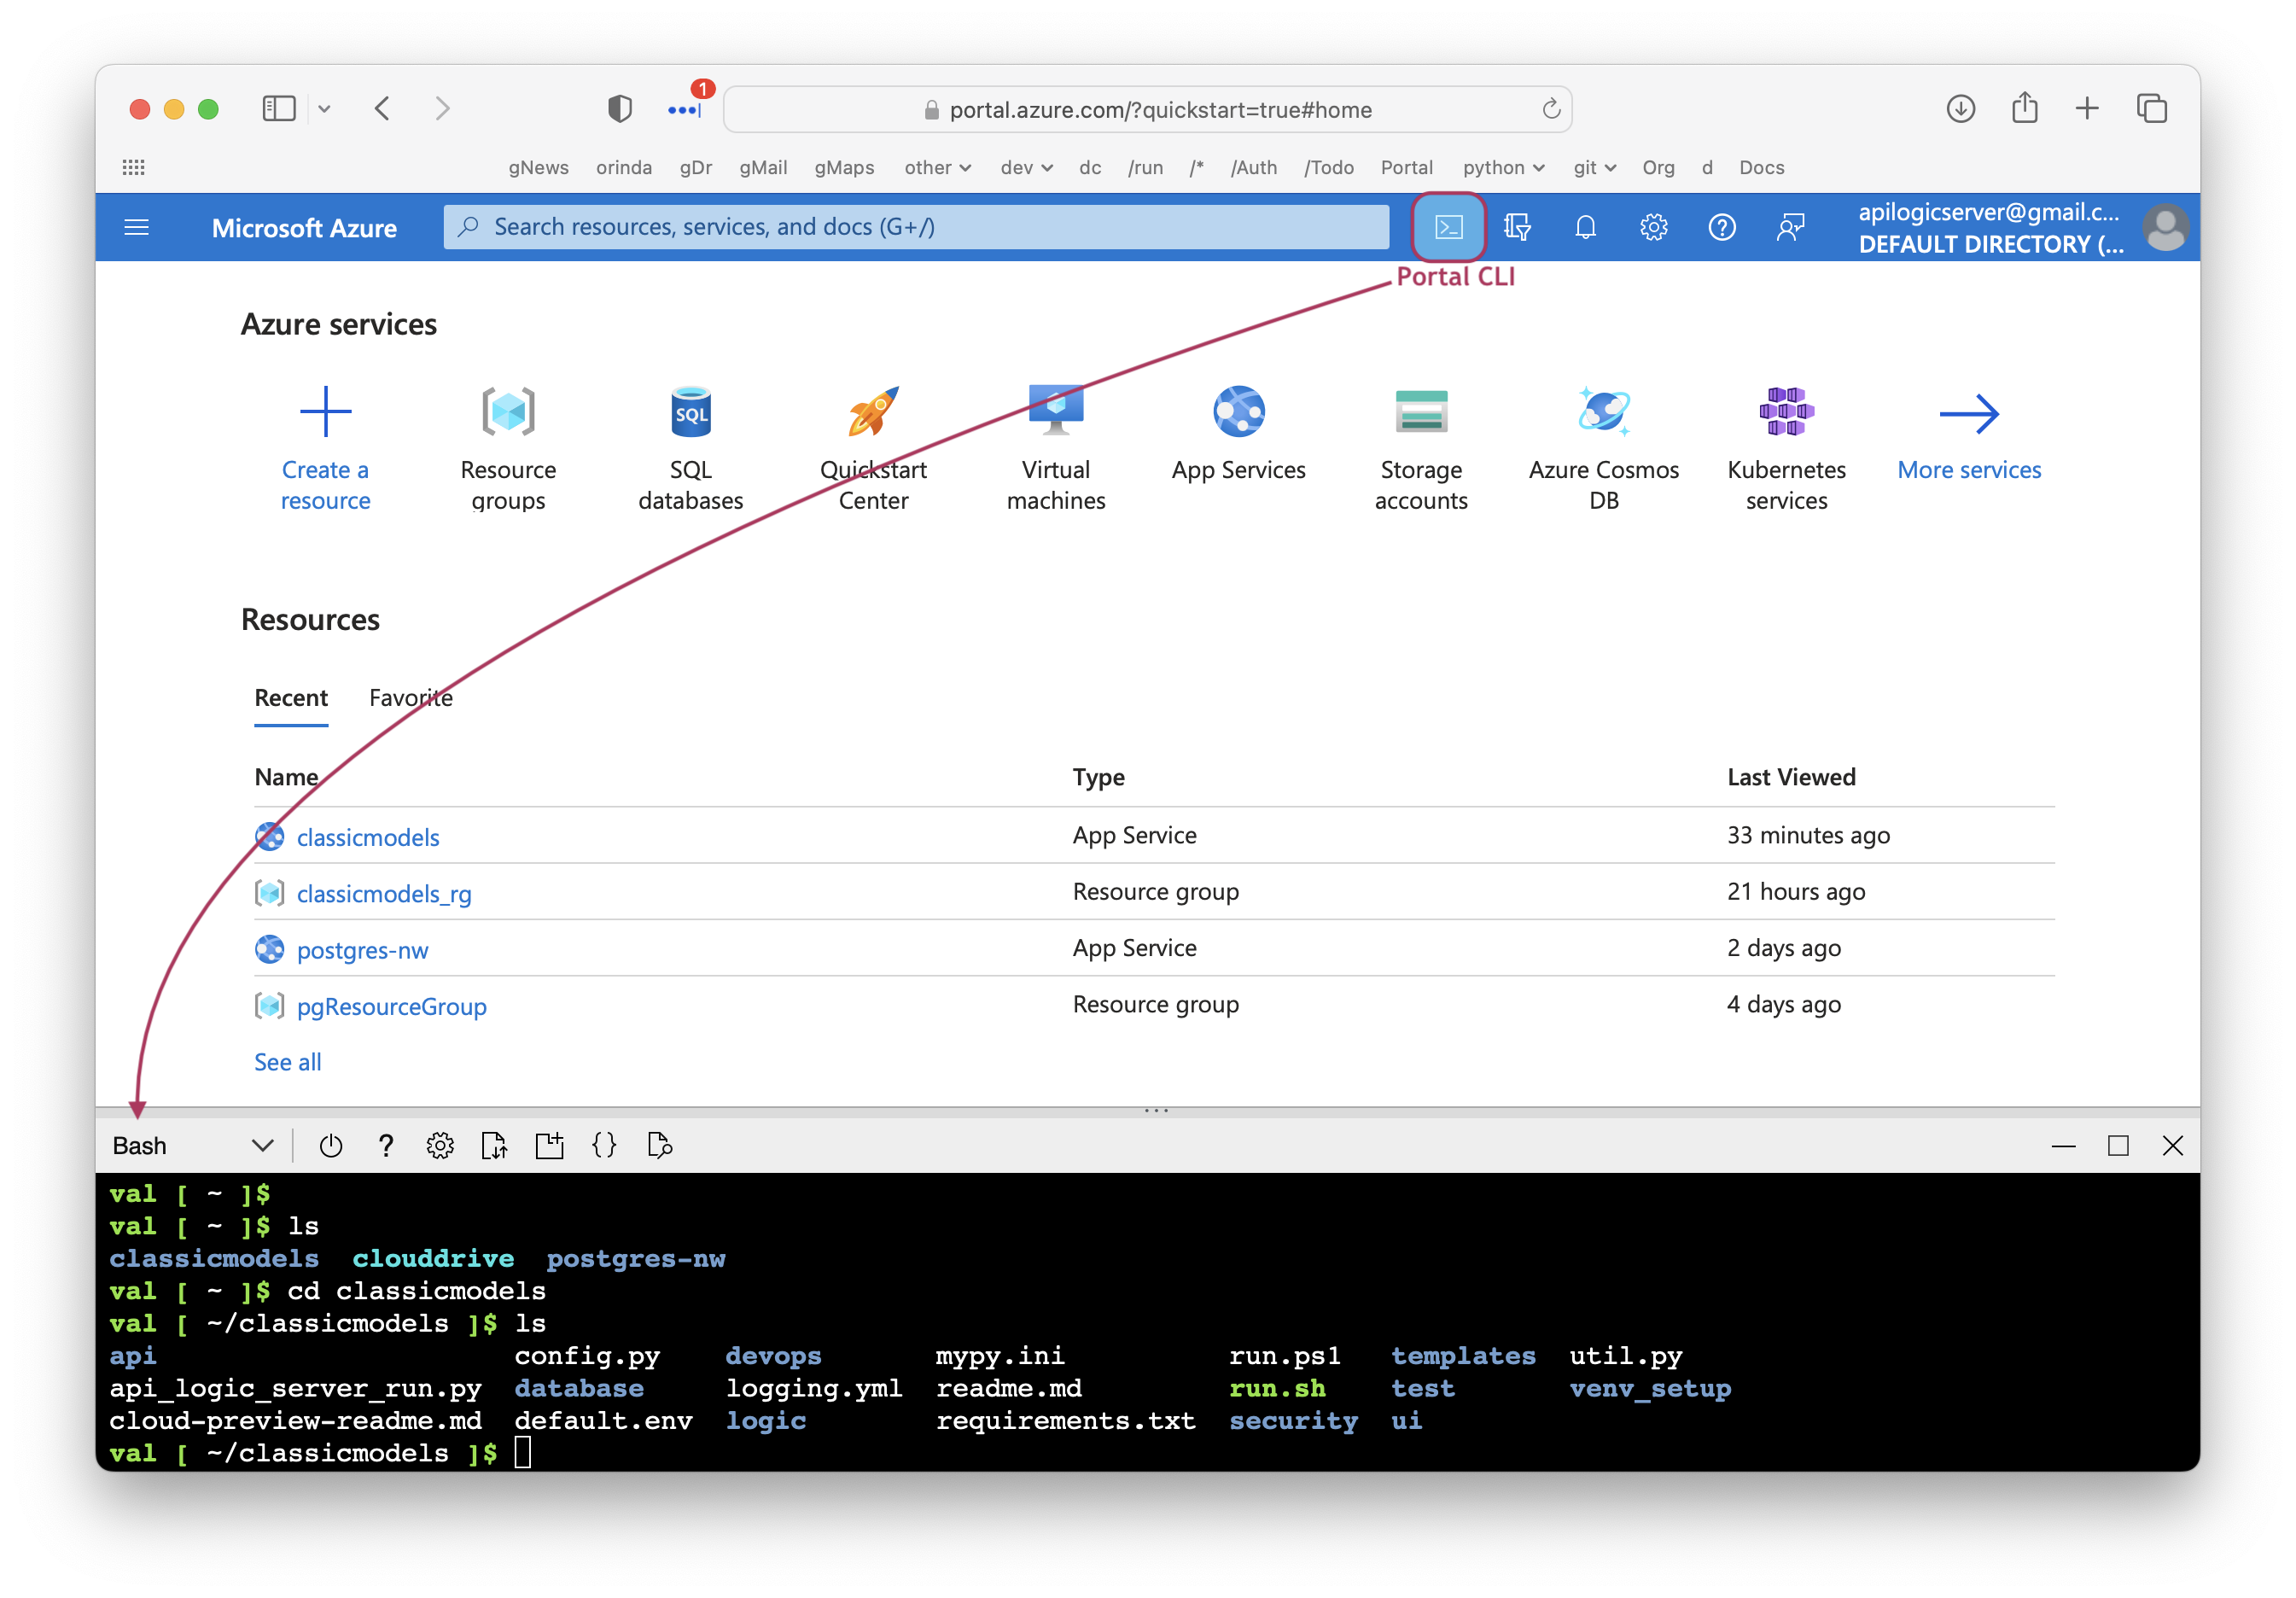
-
Login to the portal
-
In the Portal CLI:
1a. Automated Deploy
Once you have acquired the project, you can perform all of the steps below with the created script:
In the following sections, we'll perform these steps by hand so you can explore the underlying process.
2. Create container group
3. Create service plan
az appservice plan create --name myAppServicePlan --resource-group myResourceGroup --sku S1 --is-linux
4. Create docker compose app
Your create the multi-container system as shown below.
Note the argument --name classicmodels. Your docker-compose-dev-azure.yml has been pre-configured to use your lower cased project name:
This name must match --name classicmodels in the following command:
az webapp create --resource-group myResourceGroup --plan myAppServicePlan --name classicmodels --multicontainer-config-type compose --multicontainer-config-file devops/docker-compose-dev-azure/docker-compose-dev-azure.yml
So, in the postgres example:
az webapp create --resource-group pgResourceGroup --plan pgAppServicePlan --name postgres-nw --multicontainer-config-type compose --multicontainer-config-file devops/docker-compose-dev-azure/docker-compose-dev-azure.yml
If you need to update the container:
- Update youur project locally
- Push to git
- In the Azure portal,
*
git pull* Repeat theaz webapp create, above
If you need to recreate the container, you can use the portal, or this command:
5. Enable logging
Use this procedure; TL;DR:
To enable web server logging for Windows apps in the Azure portal, navigate to your app and select App Service logs. For Web server logging, select Storage to store logs on blob storage, or File System to store logs on the App Service file system.
For specific error conditions, see Troubleshooting Azure.
6. Browse to the app
To run the app, https://classicmodels.azurewebsites..
You will need to wait a bit on the first run while the containers are loaded. Subsequent performance should be fine.